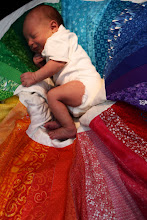
Today, I proudly declare to you, that I, mommy for six weeks, have finally conquered. I emerge victorious from the urp wars.
Soren Paul is an urp monster. His little tummy is like the loaves and the fishes for milk. Put in an ounce of milk, get three of ricotta for the next hour and a half. Urping is his super power.
The enormous quantities of urp do not take away from his cuteness, but he's quickly going through warm clothes more quickly than I can wash them, and I became alarmed when I had to change not just onesies, but his pants. When he urped clear accross small towels, onto friends and relatives clothing, and soaking all of his own clothes (pants, socks, you name it), it became clear that I was going to have to play dirty (or clean??).
So Mommy went to Target, and armed with six towels hand towels (less than $6), and a package of large flannel blankets ($9), I went to war with Soren's ups. The fruit, you see below.
They are nowhere near as cute as MakingArtAgain's, but they are super absorbent, and can stand up to even the most supercharged projectile urpage. From each of the three blankets, I got two burp cloths (err, towels?) and, what I have proudly dubbed, one "urp monster bib". I now laugh condescendingly at weaker bibs.
Easy Directions? You bet...
Prewash all fabrics. Cut the binding off of the hand towels. Fold flannel blankets in half, then cut along the fold. Iron over binding edges, folding corners in and trimming away excess fabric. Stitch close to binding edge.
For "urp monster bibs", take a standard bib, and trace onto a piece of 8 1/2 X 11" paper. Enlarge shoulders (I added 3" to mine). Cut out pattern, then trace onto wrong side of one piece of flannel using a wash-away sewing marker pen (Dritz sells a great one). Pin two layers of flannel right sides together. I used matching fabrics, and made three double sided bibs. Stitch along the marking line, leaving a 3-4" opening t the bottom edge.
Cut out the bib leaving 1/2" seam allowance, then trim one layer down to 1/4". On the inside neck seam allowances, clip seam allowances, then on the outside, clip small "v's", so layers don't wrinkle when the bib is turned right side out. Turn the bib right side out, and use a pen to poke out the bib tips.
Iron carefully, then top stitch around the entire bib. You will need snaps or velcro. I recommend a Wal Mart size 15/16 snap plier set. It's about $6, while the Dritz unit (same thing as the Wally World version) is almost $20. Don't be scammed, it's the same thing.
I encourage you, if you haven't sewn anything (or haven't sewn in a long time, or had a bad experience), bibs are a great first project. Proceed fearlessly, straight stitchers, into the land of the curved bib. Go on, I dare you!


Wow... I feel like such a slacker in comparison. I just use the cloth diapers from the diaper service and let them do the washing... I also put a diaper under his head in his playpen or crib so I don't have to wash the sheets all the time when he spits up while napping.
ReplyDeleteOh, and they look great! Very elegant solution :)
ReplyDeleteYou are too funny! Thanks for the shout out. I know how you feel, I smell baby spit up in my sleep! The other day I found some encrusted on my sleeve and I had no idea how long it had been there. Cute burp cloths, you're so talented!
ReplyDeleteok realllllly love those bibs. i wish i was talented to make those. we need to come over with some fabric and you can help me :) hope loveeeesss the spit ups too!
ReplyDeleteErin, we will sooo make bibs. They are super easy and you will totally enjoy it. It's a project I'd give to a child as a first! so easy! so fun!
ReplyDelete