In classic Sareece fashion, everything is done down to the wire. If there is a minute after the last one in which I can complete something, I'll wait for that.
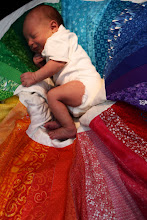
Little Meemz (A.K.A. Mimi to Soren and Peanut, who as of two days ago, we officially know to be Helen) is leaving to go see her new granddaughter tomorrow. I repeat TOMORROW, so of course, I finished Helen's presents TODAY.
The dresses (as you may have read in previous posts) are my own design, each made from about a half a yard of fabric. I purchased 1/2 yard of two knits to make McCall's layette shirts pattern 8574. I had already made a onesie for Soren using the same pattern, and the second time around, made some alterations.
- On the neckline, the allowed hem is 5/8 inch. I added bias tape at the neckline and sleeve hems. My finished hem essentially extended to the edge of the pattern cutting line. If you were to hem it another way, I would definitely alter the pattern to narrow the neck opening considerably.
- I lowered the curve of the front neckline so it was more of a scoop. It was hard for me to tell the difference between front and back. I also added a small tab of fabric to make the back obvious.
Helen's presents are with Mimi on their way to Pennsylvania. She won't be able to wear them until she's bigger and already living in Ireland, but I'm pretty sure she liked them. The red dress is HANDS DOWN the cutest, most fun little thing I've ever made. The blue and red are going to Hannah and Helen... the green flowers are going to a friend who is long overdue for a thank you gift from my little family.
I promise, these will be the last pictures I will post of the wee dresses.
 The cherry Red shirt with rose print tea dress is my favorite. When I say favorite, I mean, I wish I could wear it myself.
Do the rose buttons make the dress, or the dress make the rose dress make the buttons?

The button holes are made using a vintage Singer buttonholer attachment that I used in tandem with my 1942 Singer Featherweight. It is a fabulous tool, and I love the work it does. I'll upload a video tutorial very soon. It wasn't easy to figure out how to use it without having any instructions, and the attachment isn't hard to find. It's a fantastic tool and I highly recommend than anyone with a Featherweight obtain one.

I made the shirt binding using bias strips that were 2 1/2" inches wide. Fold them in half, and stitch, right sides together using approximately 1/4" seam allowances (I serged mine together. If you aren't serging, be sure to stretch slightly as you stitch so the neckline has some give). Press seam allowances toward the neck opening, and fold over with enough to overlap. I used a straight stitch "in the ditch" technique, stretching slightly, to complete the edge treatment.

Some dresses are treated with pleats, front and black, to create enough give in the skirt for a child's movement. The blue dress below has gathers at the center front and back.

And how could you help but adore these buttons? I had a bunch for a blouse I made pre-pregnancy, and had two left over. Divine perfection!


No comments:
Post a Comment